What You’ll Need
- Plastic container with lid (8.3″ x 13.5″ x 4.7″ or bigger)
- Floater
- Receiver & Nut
- Small wire
- Air lock
- Standard airline tubing
- 3 Planters
- 3 Small plants
- Grow medium
- Bottle stand
- Empty plastic bottle (2 L)
- Nutrient solution
Step-by-Step Instructions
Step 1: Download the digital files

Download the 3D-printed parts you need to build our non-circulating hydroponics:
- Floater
- Receiver
- Nut
- Air lock
- 3 Planters
- Bottle stand
Step 2: Print the parts

If you’re using a MakerBot or Ultimaker, we recommend the following settings:
- Medium quality
- 0.2 mm
- 10% fill
- 2 shells
Step 3: Prep your plastic container

(a) Cut three equal holes in the lid of the plastic container. The holes should be the same size and shape as your planters. (If you’re using the round planters, you’ll need to make round holes. If you’re using the square planters, your holes will have to be square.) To make this process easier, we suggest using a hole saw set, available at most home hardware stores.
(b) Make another hole on the side of the plastic container so that the Receiver shaft can fit through.
Step 4: Put the Receiver assembly together
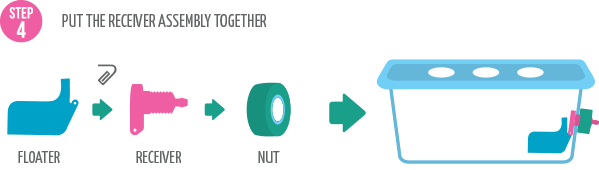
Attach the Floater to the Receiver using a small wire bent at the sides to hold the two parts together (a paperclip will do the trick). Working from the inner side of the plastic container, slide the Receiver shaft through the side hole and secure it to the container using the Nut. The body of the Floater should be hanging near the bottom of the container.
Step 5: Connect the tubing

(a) Slide the air lock over one end of your rubber tubing. Attach the tubing to the tip of the Receiver and slide the air lock over the connection to seal it and prevent water and air from escaping.
(b) Connect the other end of the tubing to the bottle stand, using the air lock.
Step 6: Prep your planters
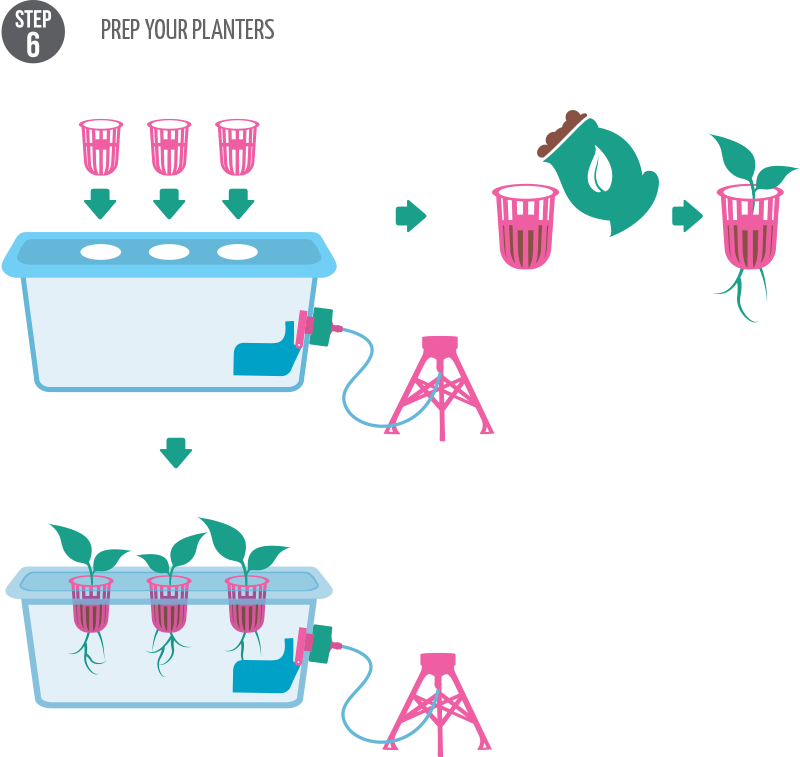
Fit the 3 planters snugly into the 3 holes that you cut in the container lid. Fill them with your grow medium of choice. As you go, add your plants, making sure not to damage the roots.
Step 7: Fill the container with water
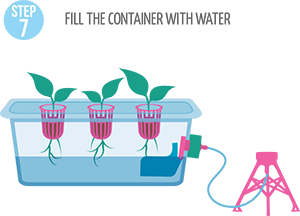
Start adding water to the container. When the Floater rises and blocks the small hole in the Receiver, you have enough water. Cover the container with the lid and planters.
Step 8: Prepare the nutrient solution
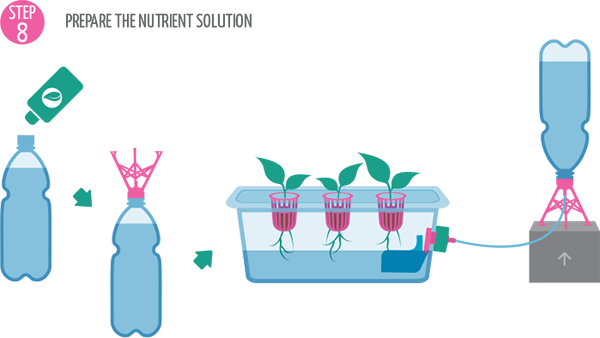
Fill your empty plastic bottle to the top with the nutrient solution. Screw the bottle stand to the bottle like you would a standard cap. Flip it over and place on a flat surface, making sure that it’s positioned at a slightly higher level than the plastic container.
How it works
As the water in the plastic container gets used up the plants, the Floater will start to drop, opening up the hole in the Receiver, which will allow more nutrient solution to enter the container.
The system is self-regulating in the way that once enough water has entered the container, the Floater will rise back up and block more water from entering. All you have to do is change the nutrient solution every few weeks. No pump and no electricity needed!